


Plan the picture wall
First and foremost, it's important to decide where you want your picture wall to be. Is it a large empty wall or is there a sofa in front, a TV hanging on the wall or something else that you need to think about? Review what conditions you have. When that's done, it's time to choose motifs. Maybe you have some paintings at home that you want to incorporate or do you want to start from scratch? At Photowall, we currently have more than 20,000 motifs to choose from. So there is something for everyone!
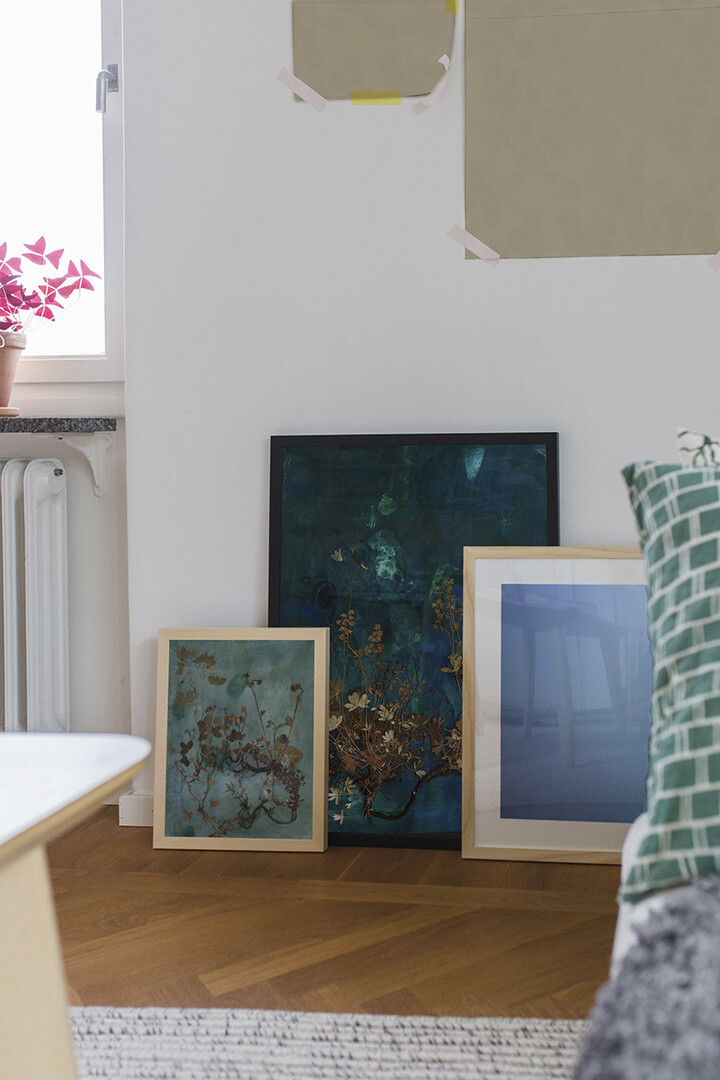
Start by selecting a bunch of favorites and see how they fit together (Do you know that you can heart-mark your favorites and easily see them gathered on one page?). If you like working digitally, you can collect all your favorites in one document and place them next to each other. This way, you get a quick overview of what your future picture wall may look like.
Once you have decided on your motifs, it is time to decide on the size of the prints. All Photowall's prints are available in several different sizes and you can choose with or without a white border. In addition, there are three different frames, white, black and natural. Here you can let the motif decide which frame fits best and mix as you like. Or you decide on a type of frame for everyone.
A few compositions
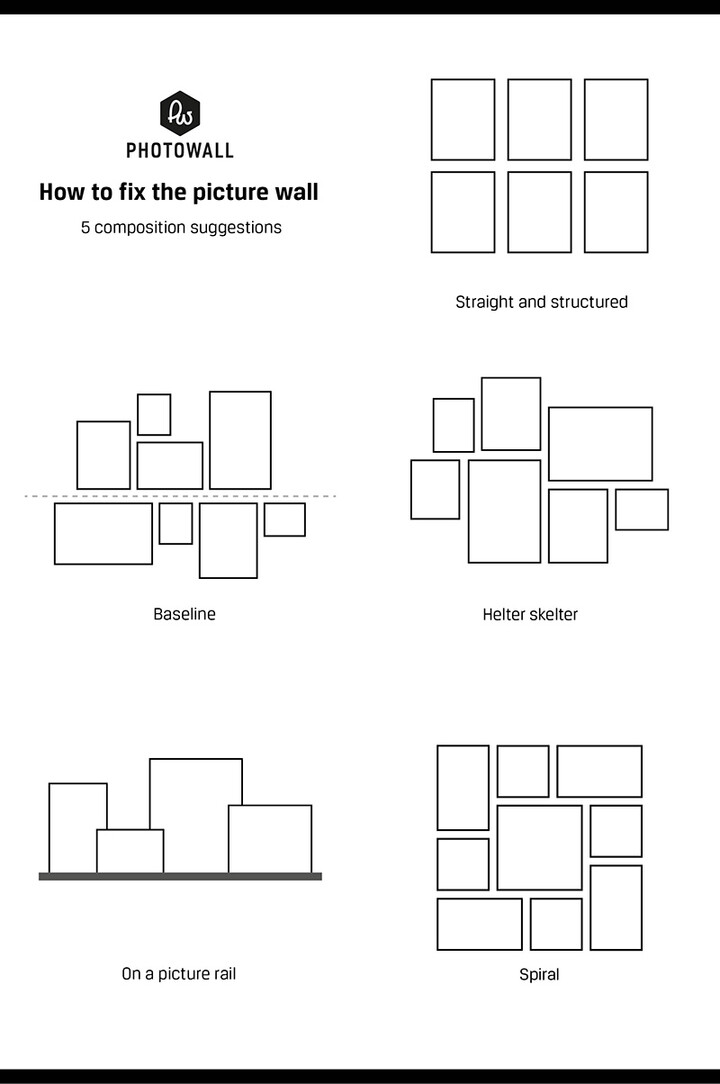
There are thousands of different ways to hang prints. But sometimes it can be nice to stay within a certain style. Or at least inspired by something. Here are five different composition suggestions that may be helpful.
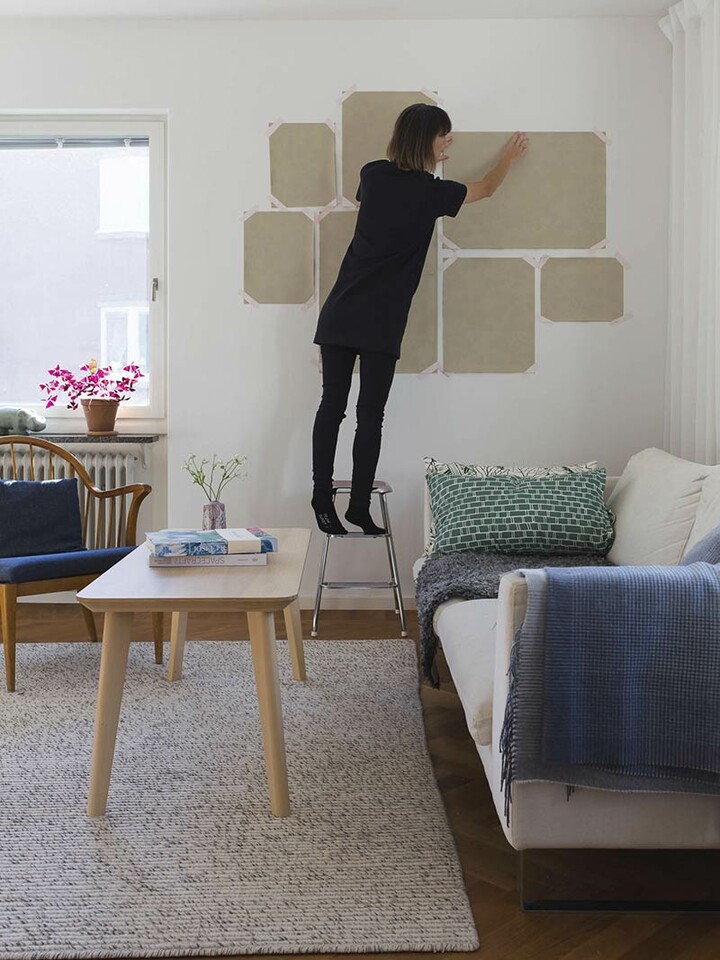
To get a sense of what size you should have on the prints, it can be good to test them on your wall. If you work digitally, you can take a picture on your wall that should have paintings and then place them on the computer. If you want to work more analog, it is easy to put up washi tape or masking tape on the wall and "draw" the picture wall that way. Then you can get the correct size and dimensions directly on the wall. It is also easy to cut out pieces of cardboard or squares in large pieces of paper that you attach to the wall or lay out on the floor. Then you can easily move around your picture wall and feel how you want it.
Once you have decided on the size and motif, it is just a matter of placing your order.
Different walls and materials
When you are waiting for the delivery of your prints, it can be a good idea to make sure that you have the right tools at home for mounting your prints. Do you know what type of wall you have? Congratulations! Then you are one step closer. Check with the staff in your DIY store regarding which type of wall bracket you should use to hang your prints. If you don't not know which type of wall you've got, you can try to find out by knocking on the wall and listening to the sound. Sometimes it can be difficult to know if a wall is made of brick or concrete, for example. Then you can drill a small hole in the wall and see what type of drilling dust comes out. It can reveil what's in your wall.
A few different wall types are:
- Wooden wall
- Concrete wall
- Lightweight concrete wall
- Brick wall
- Plaster wall
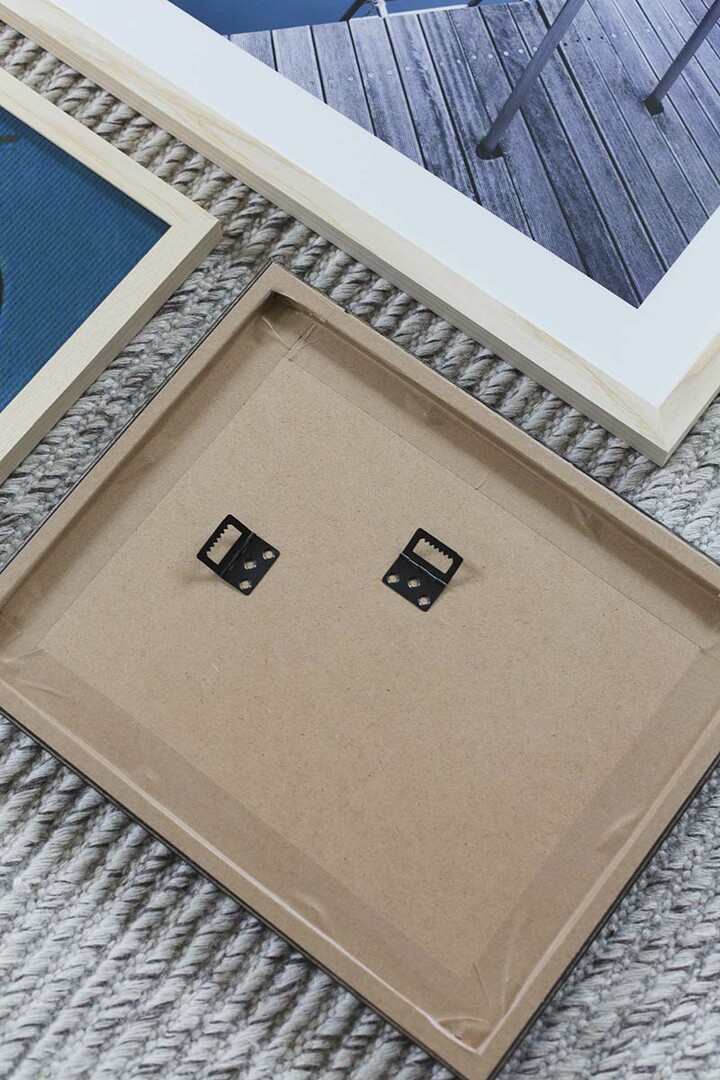
Good to keep in mind when hanging the prints on the wall
Now we get to the fun part, the transformation! Now it's time to hang the prints on the wall. Depending on what kind of material you have in your wall or other conditions, it is time to nail, drill, screw or perhaps use picture suspension that leaves no traces and is just glued to the wall. The last option is flexible if, for example, you live in a tenancy or student apartment and are not allowed to make holes in the wall. If you are unsure, check with the staff in your store what they would recommend.
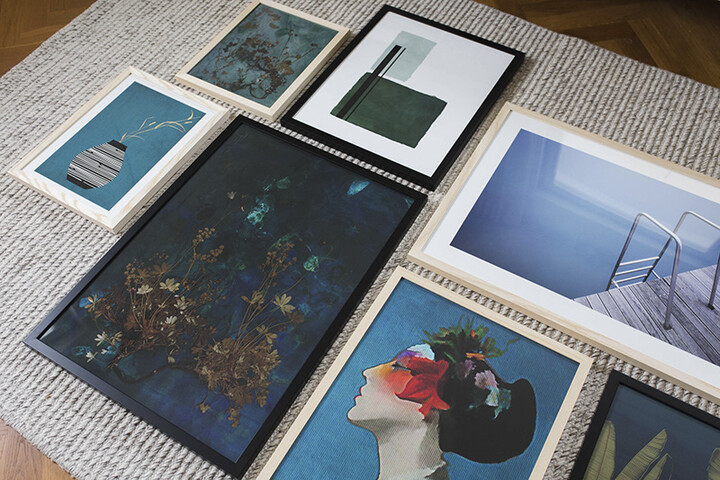
To get a good overview, it is easy to lay out all the paintings on the floor. Then you can get a feel for the distance and locations of the actual prints. Measure and mark on the wall where you are going to make holes. A trick is to use the same paper that you sketched with on the wall and make a mark on them where the bracket is located. Then just nail it straight through the paper. Then you know you got the nail in the right spot.
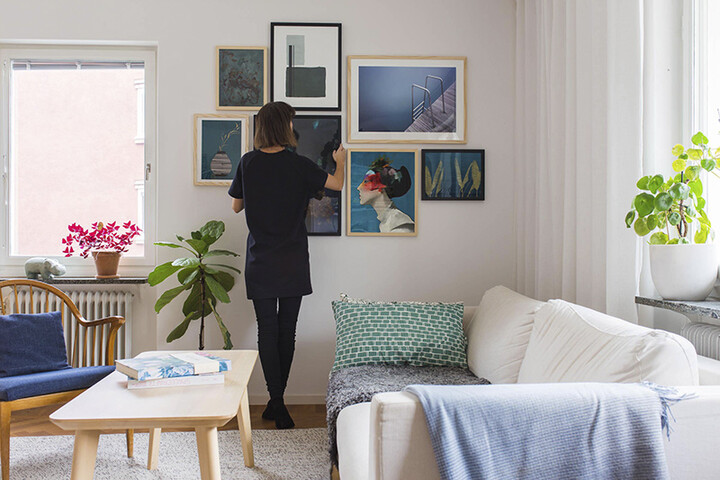
Good luck with your picture wall!
5 tips for a nicer picture wall
- Set the center of the prints to eye level. Then you get a good balance in the room.
- Have an even distance between the prints for a calmer impression
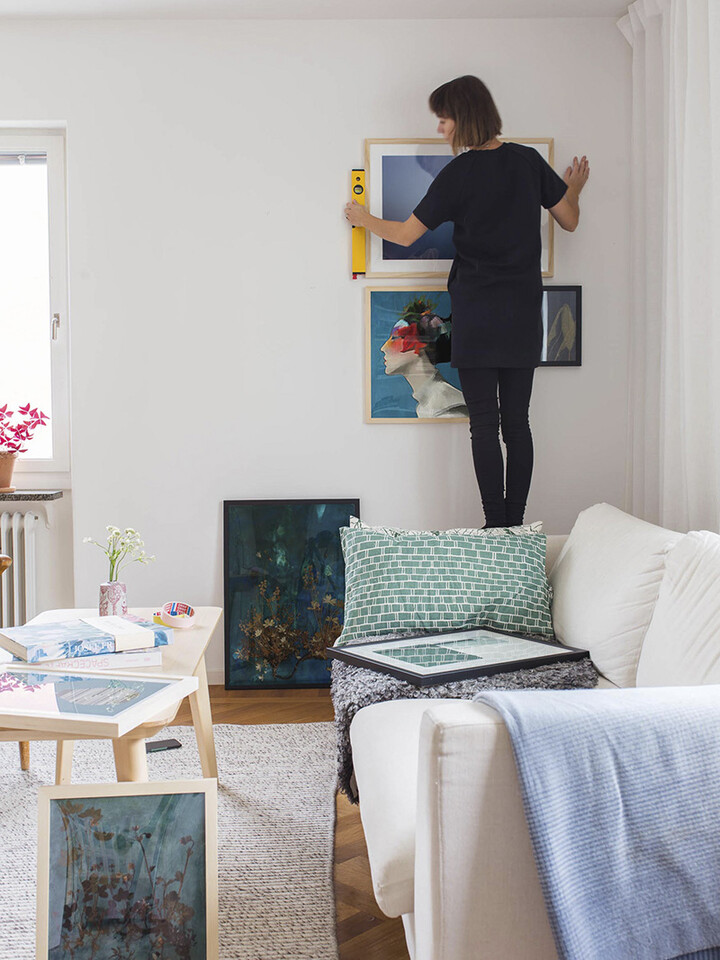
- Hang the prints straight! A common mistake is that they hang a little crooked, use a spirit level to make sure they are really straight.
- If you hang the prints behind your sofa, then keep in mind that you should be able to lean back without hitting your head in a frame.
- Low ceilings - hang paintings all the way up to the ceiling and it gives the illusion that the ceiling is high.
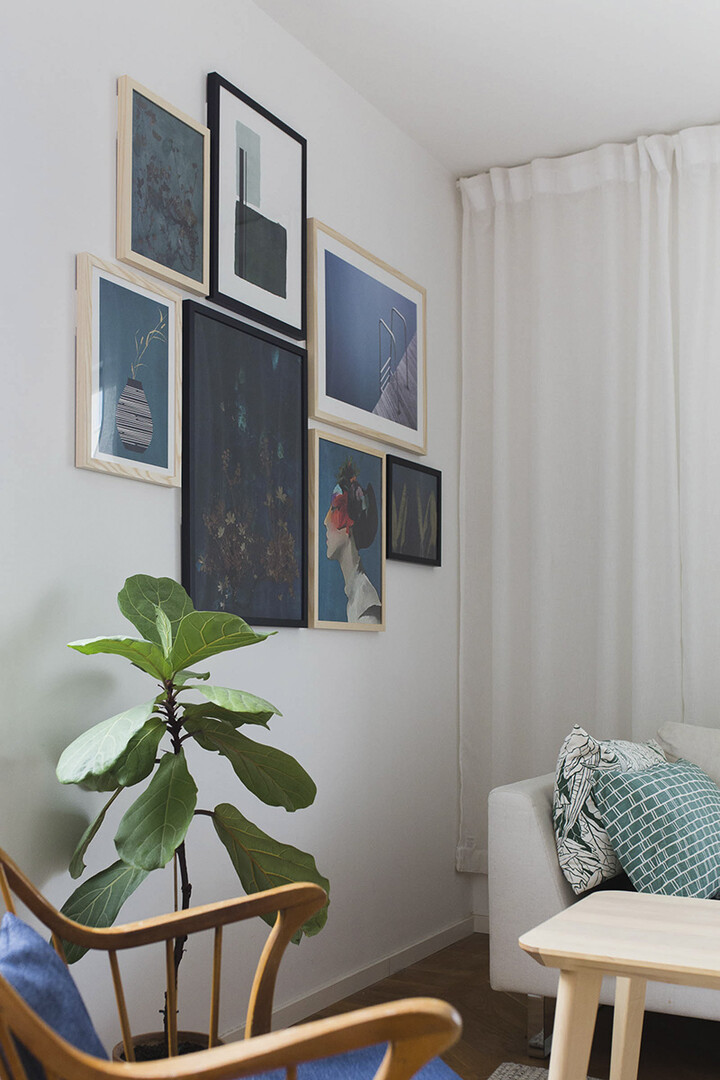
The products included in the picture wall above are:
Equilibrium, Rhizome, Plateau, Stairs, Kimono, Turquois Bouquet, Leafage - Dark
---
Anna María Larsson is a creator, inspirator and DIY professional. She is of the firm opinion that everyone is creative and can come up with ideas; it only requires a little training. She appears on a regular basis on TV, holds workshops and gives lectures. She shares what she creates and offers inspiration with her blog and Instagram account @dnilva.