 Australia
 Austria
 Belgium (Dutch)
 Canada (English)
 Denmark
 Estonia
 Finland
 France
 Germany
 Ireland
 Italy
Italy
 Japan
Japan
 Luxembourg (French)
 Netherlands
 New Zealand
 Norway
 Poland
 Portugal
 Romania
 Singapore
 Spain
Spain
 Sweden
 Switzerland (French)
 USA
USA
 United Kingdom
 Other Countries


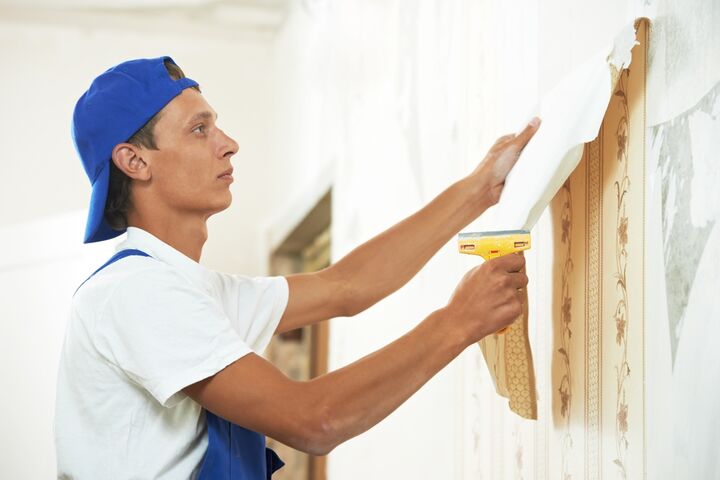
The best way to remove wallpapers
Many homeowners prefer to use wallpaper instead of paint for the reason that wallpapers have designs that can never be matched by paint. In addition to that, wallpapers can cover the imperfections of the wall and can add textures and patterns that cannot be seen in paint. The usual time frame for wallpaper is around 15 years, and that Is with little maintenance. If that time comes, there are various ways on how to remove the wallpaper so that you will be able to replace it with new ones or simply have the wall painted.
Different methods in removing old wallpaper
There are various ways on how to remove your old wallpaper. But to tell you the truth, do not expect that it will be easy like singing the ABC or counting 123. many homeowners who have done this before recommend to reserve at least five days so that the project will not look like done haphazardly.
Here are some steps on how to remove the wallpaper:
1. Keep the floor clean and dry – removing the wallpaper will be a little messy and sticky, so protect the floor by covering it with plastic. You may want to protect also the furniture and other woodwork by covering them as well. If it is possible, remove the furniture or relocate them somewhere where they will not be damaged. Do not forget to tape the plastic to keep them in place.
2. Tear off the facing of the wallpaper – without using water, remove the first layer of the wallpaper and leave the backing on the wall. By doing this, it will be easier to soak the wallpaper making the job easier. With the use of a putty knife, start removing the edge of the paper and pull the paper slowly.
3. Soften the paste – use hot water that you can tolerate. Soak the backing and the remaining of the top layer of the wallpaper to soften them including the adhesive. Do this in small sections so as not to over soak the wall since some walls may get damaged if they are soaked in water for a long time. Use sponge in applying the water, and once the backing softens, you can check it using your fingers.
4. Remove the backing – using a metal spatula or a putty knife, scrape off the backing of the wallpaper. The use of flexible metal spatula is recommended so it won’t dig into the wall.
5. Remove stubborn paste – with the use of gel stripper, spray them over the stubborn paste and the remaining backing of the wallpaper. Let it stand for about 15 to 20 minutes before scraping them off until all the paste is completely removed. Rinse with water until the surface of the wall is smooth.
Reminder: Be sure that all paste has been removed because, if not, it will just crack when you cover it with paint.
6. Sand the walls – using the hand sander, smoothen the surface of the wall and remove the remaining backing and paste. After which, apply with the appropriate primer.
7. Prep the wall – after removing and sanding the surface of the wall, prepare the wall for painting or installation of new wallpaper. If you plan to install wallpaper again, apply primer first on the wall so that the next time you remove the wallpaper, it will be easier.
8. If the adhesive and backing of the wallpaper is difficult to remove, there are other solutions for them to be removed:
- chemical strippers
- scoring tools
- electric steamers